What is the Agentforce Testing Center?
The Agentforce Testing Center is a Salesforce tool that enables admins and developers to validate and ensure the reliability of AI agents built with Agentforce before deploying them to production. It provides a framework for creating, managing, and running automated tests that simulate real-world user interactions and conversation scenarios.
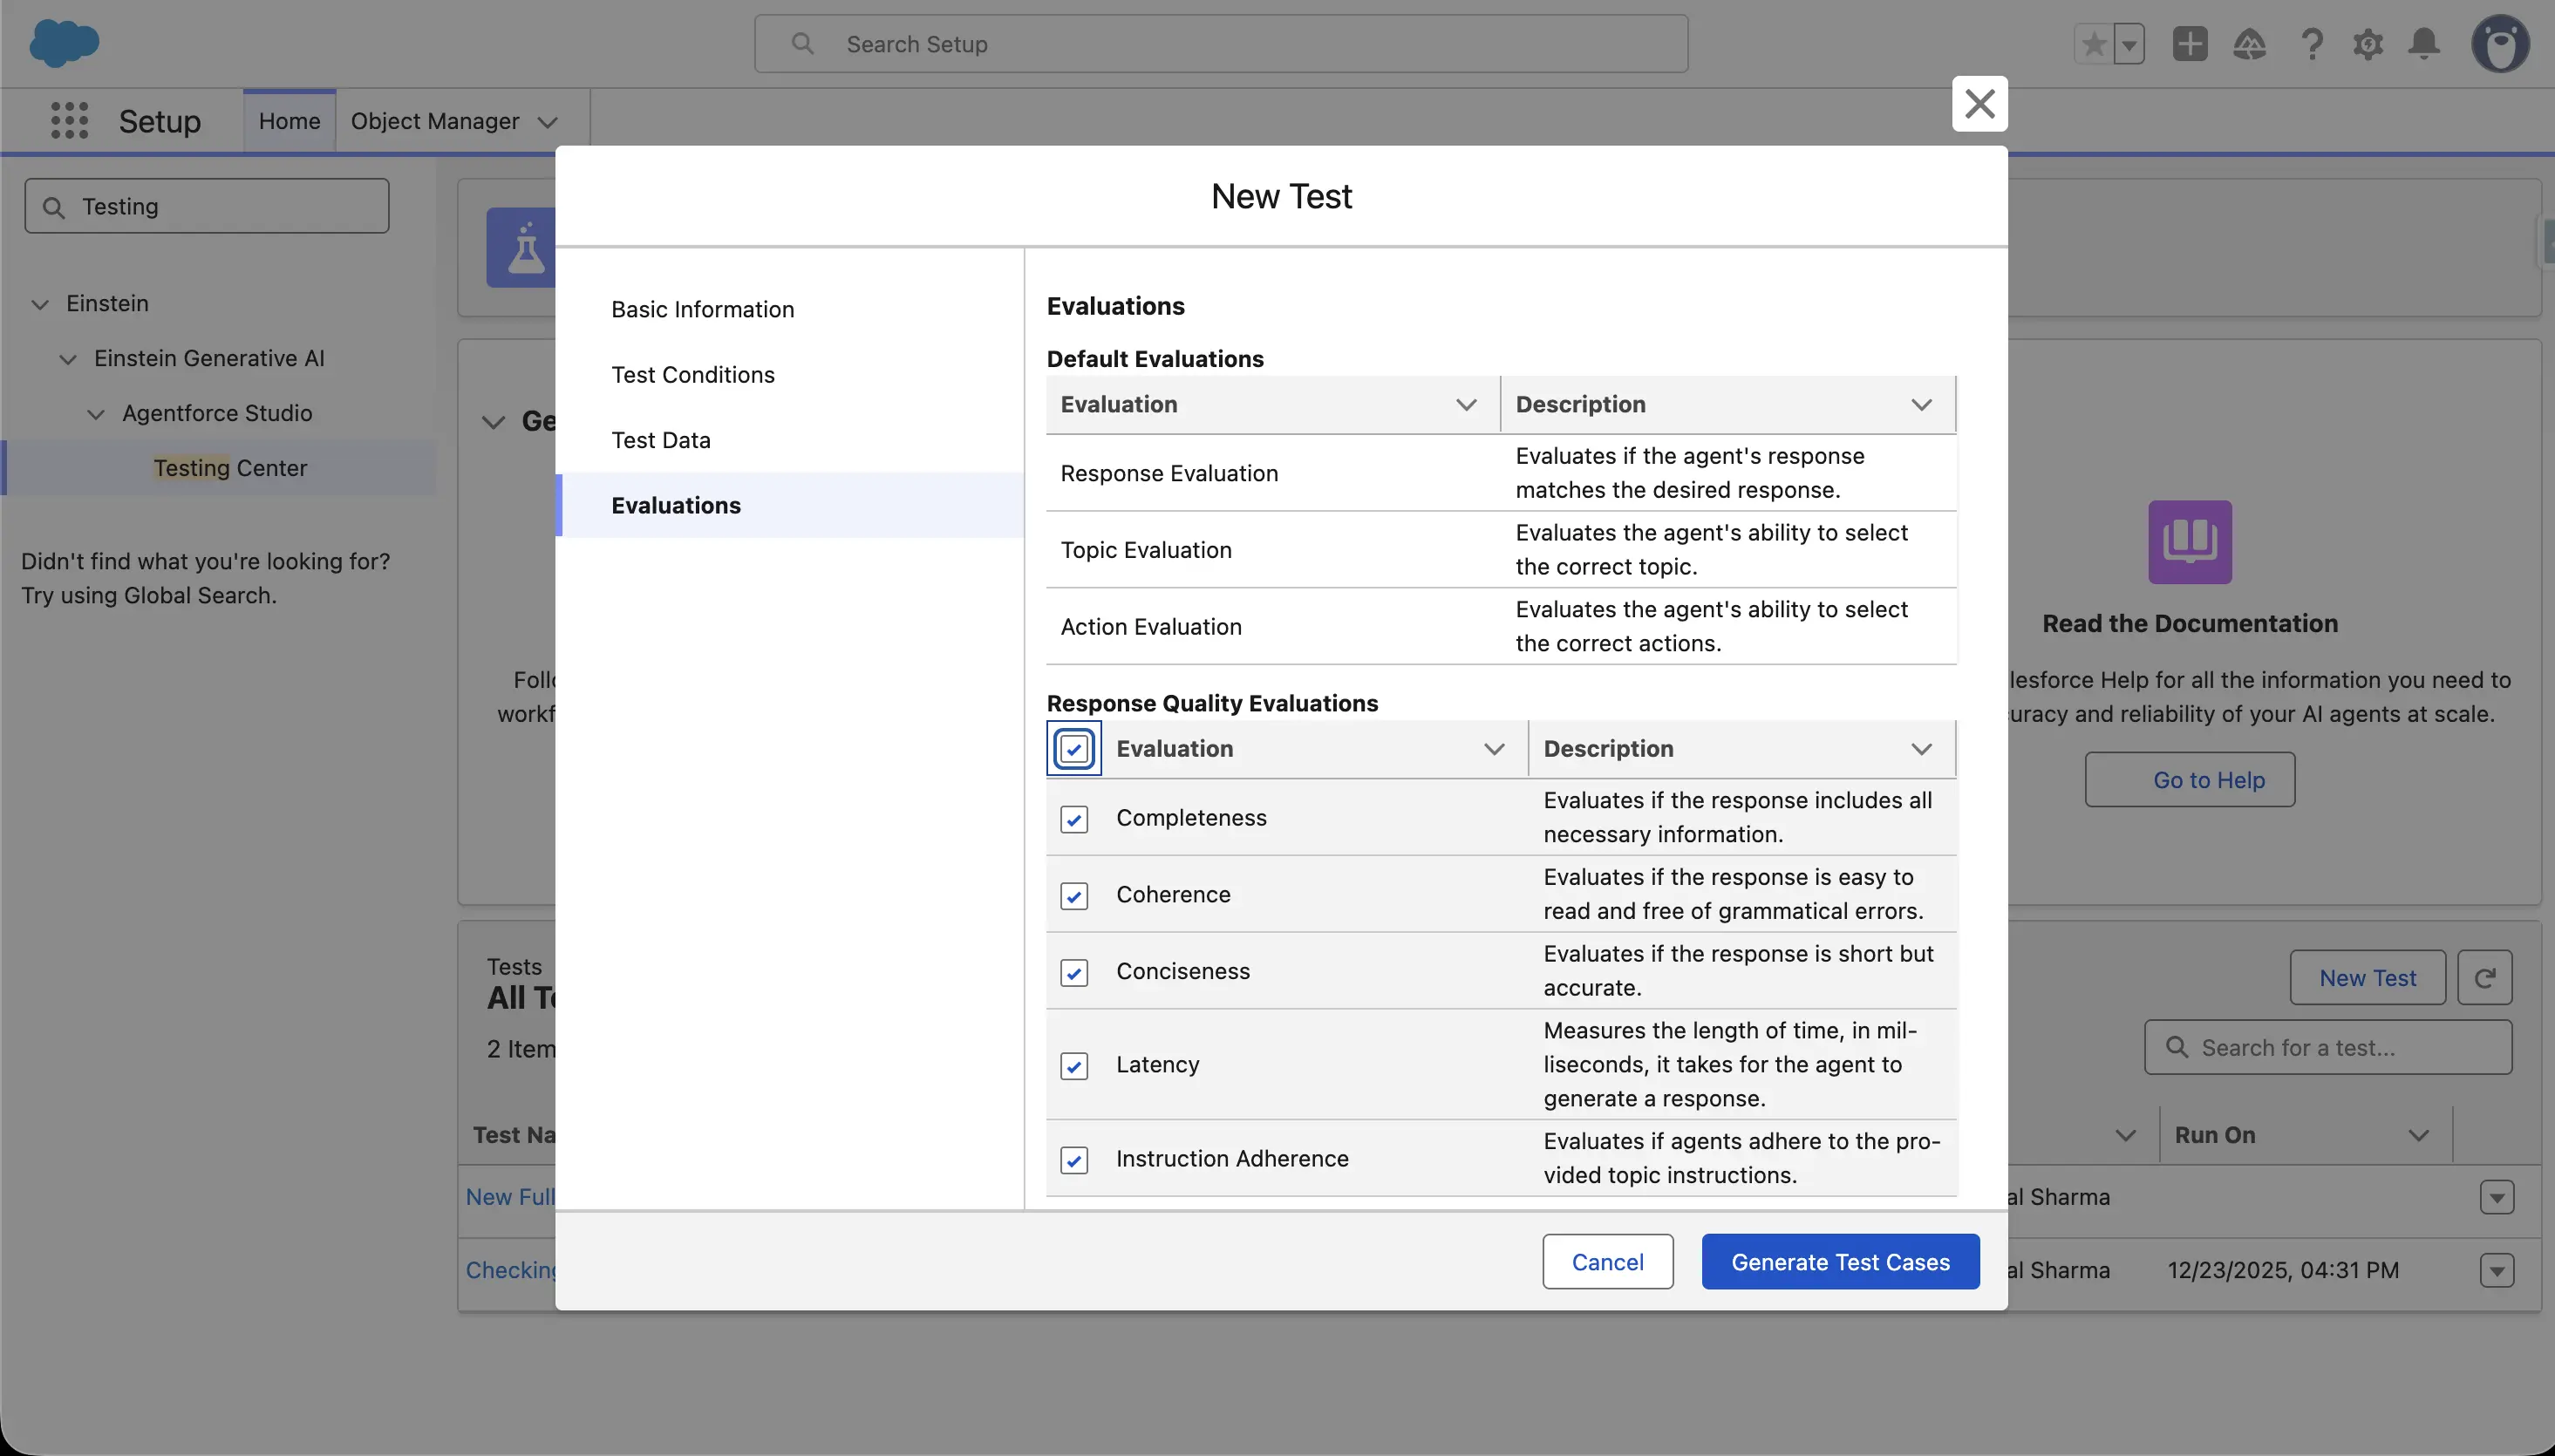
Testing Center supports batch testing, evaluation of expected topics and actions, and comparison of expected versus actual responses to validate agent logic, intent handling, and action execution.
Why Testing Custom Agents is Important
AI agents are designed to interpret utterances (user inputs) and select appropriate topics and actions; however, AI responses can vary based on context, phrasing, and conversation history. This makes testing crucial because:
- It validates that an agent behaves as expected across diverse scenarios.
- It ensures correct action execution and topic selection.
- It prevents unexpected responses or mis-routed actions in production.
- It builds confidence that the agent meets business requirements and handles edge cases reliably.
Testing early and often helps refine guardrails, improve conversational quality, and deploy trustworthy agents.
Overview of the Testing Center Workflow
The Testing Center workflow generally includes:
- Access the Testing Center: Navigate to the Testing Center from Setup or Agentforce Builder.
- Set Up Test Criteria: Create a new test and configure basic settings.
- Create or Upload Test Cases: Define test cases manually via CSV or generate them with AI.
- Select Test Criteria: Review and finalize the test scenarios.
- Run Your Test Suite: Execute the tests in batch.
- Review and Analyze Results: Evaluate outcomes and iterate.
Step-by-Step: Using the Testing Center
1. Access the Testing Center
To open the Testing Center:
- From Setup, search for and select Testing Center.
- Alternatively, from Agentforce Builder, click the Batch Test button above the Conversation Preview panel, this takes you directly to the Testing Center UI.
This acts as a central hub where you can define, upload, and run tests for any agent available in your org.
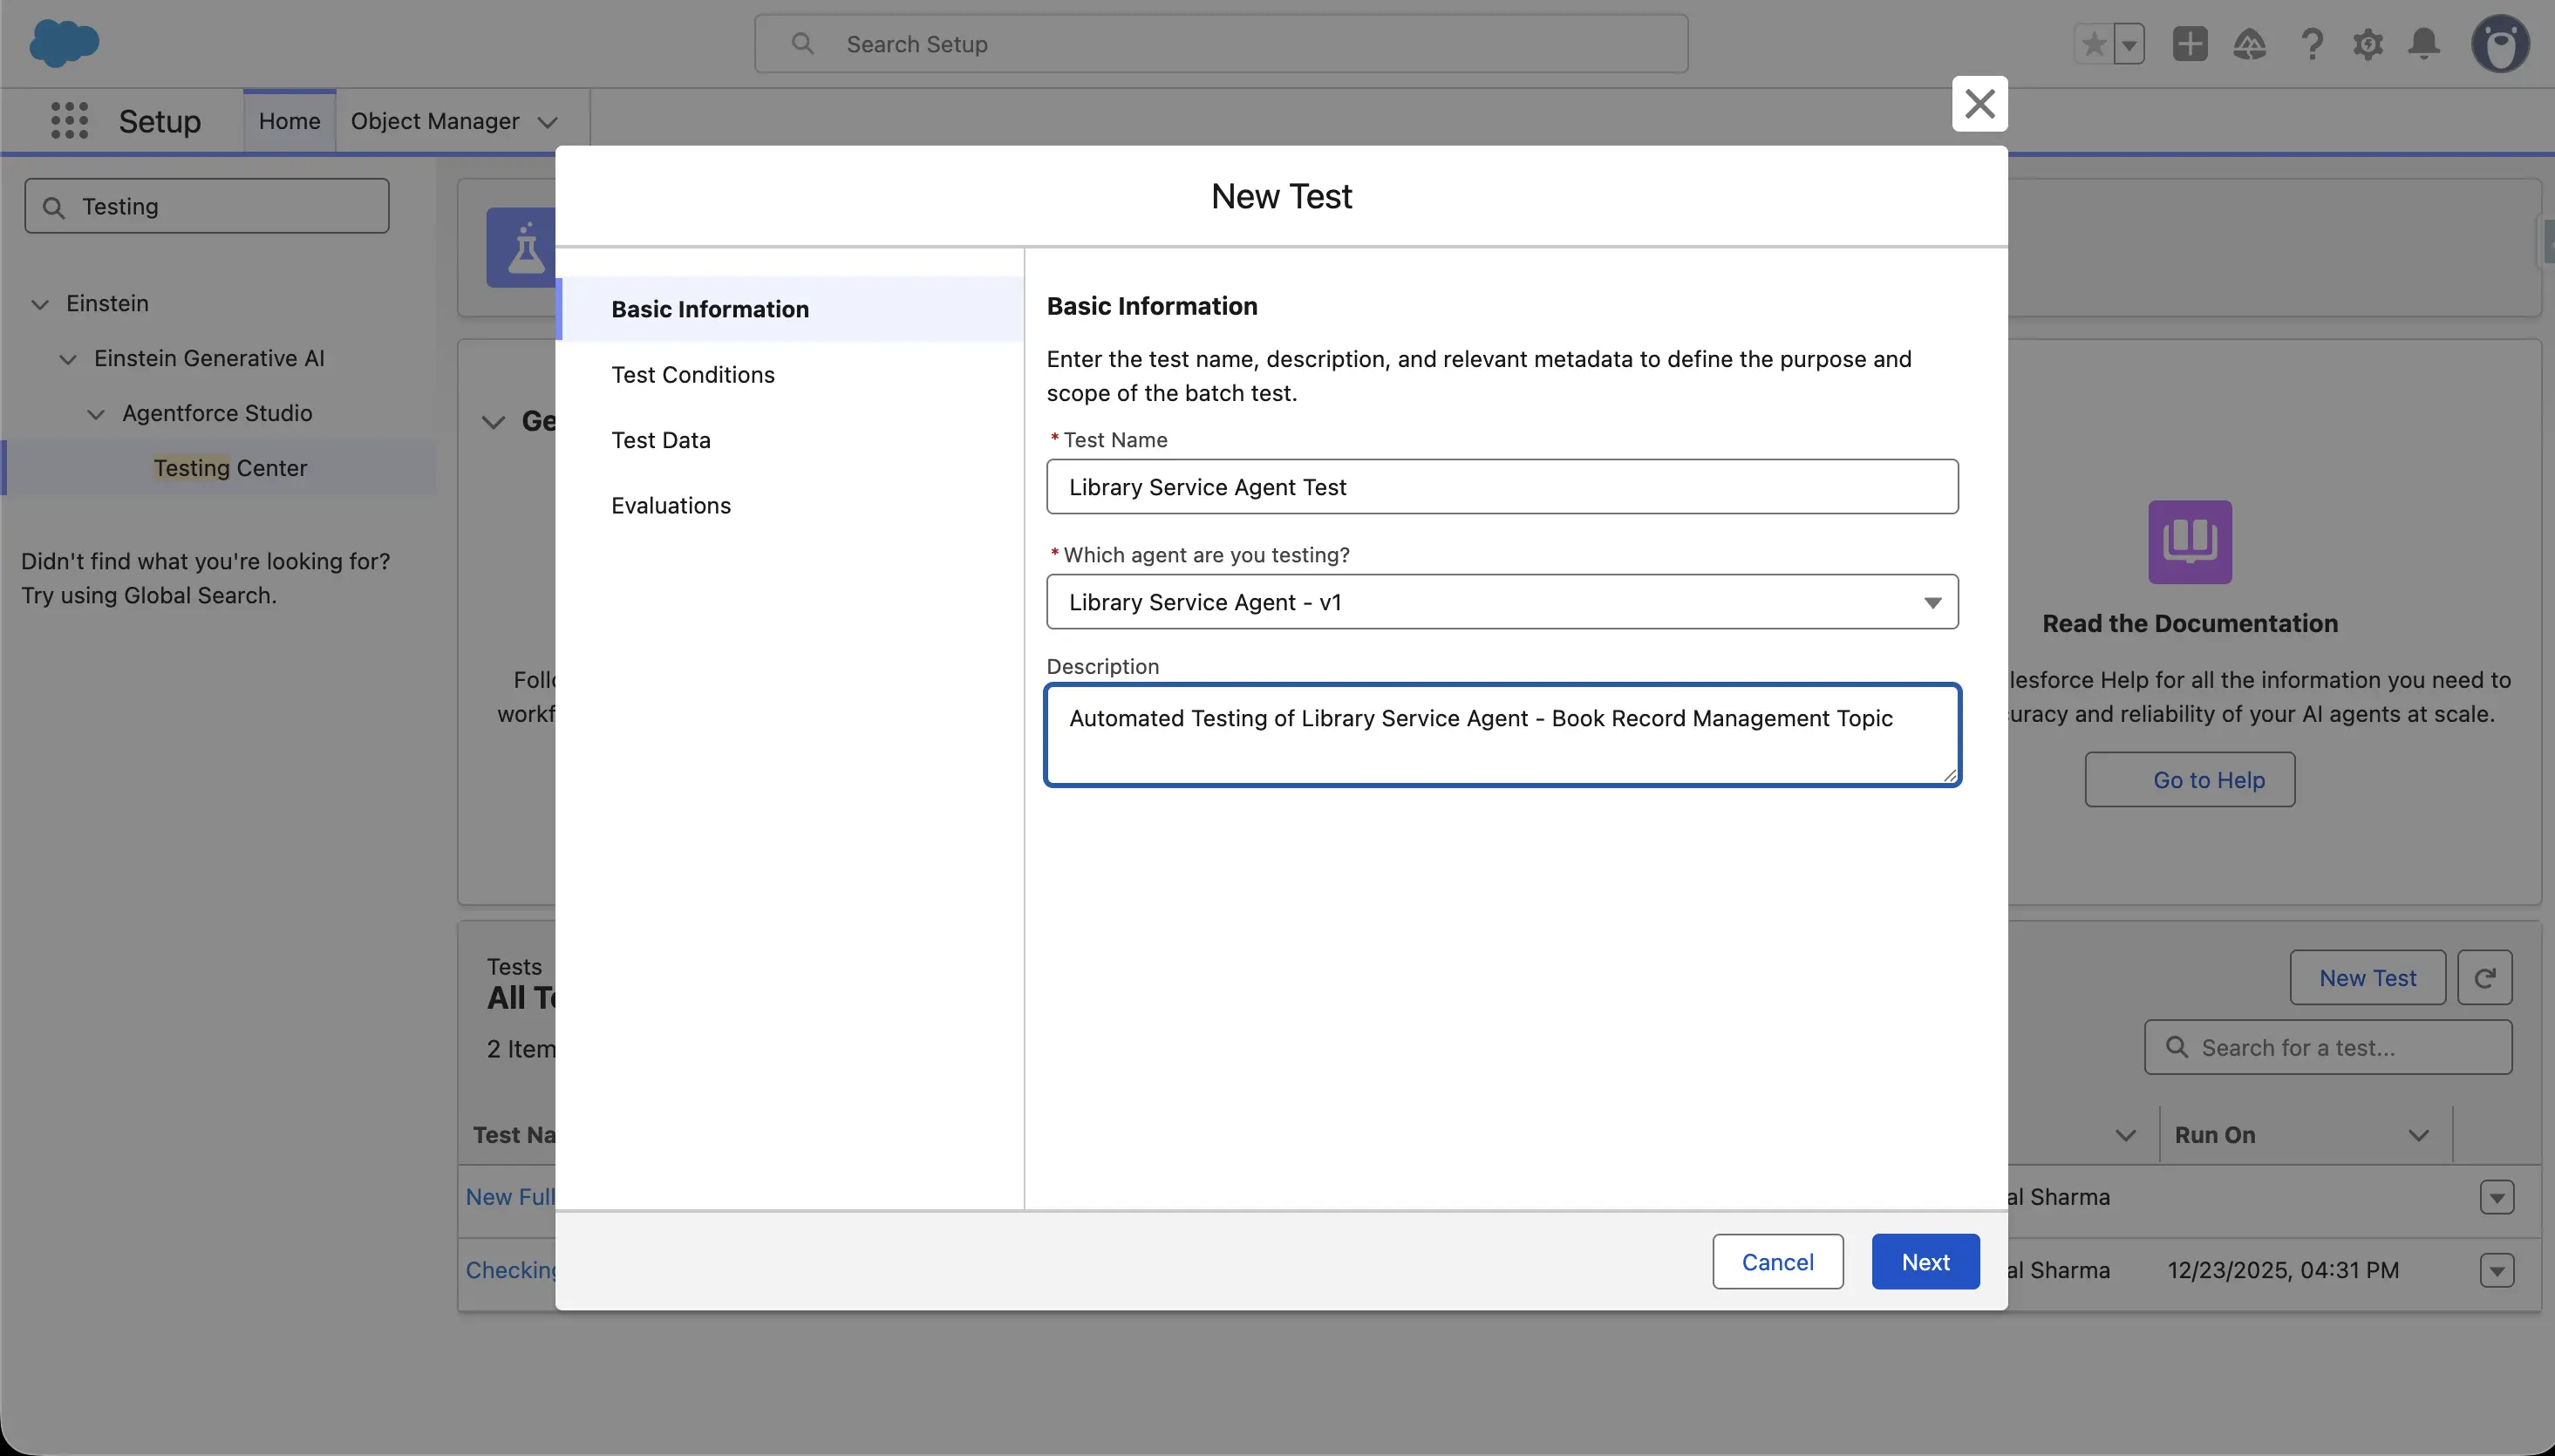
2. Set Up Test Criteria
Once in the Testing Center:
- Click New Test.
- Enter a Test Name and select the agent you want to test.
- Provide an optional description that explains what this test verifies, for example: “Test customer case lookup agent responses”.
- Proceed to the next step to upload or generate test scenarios.

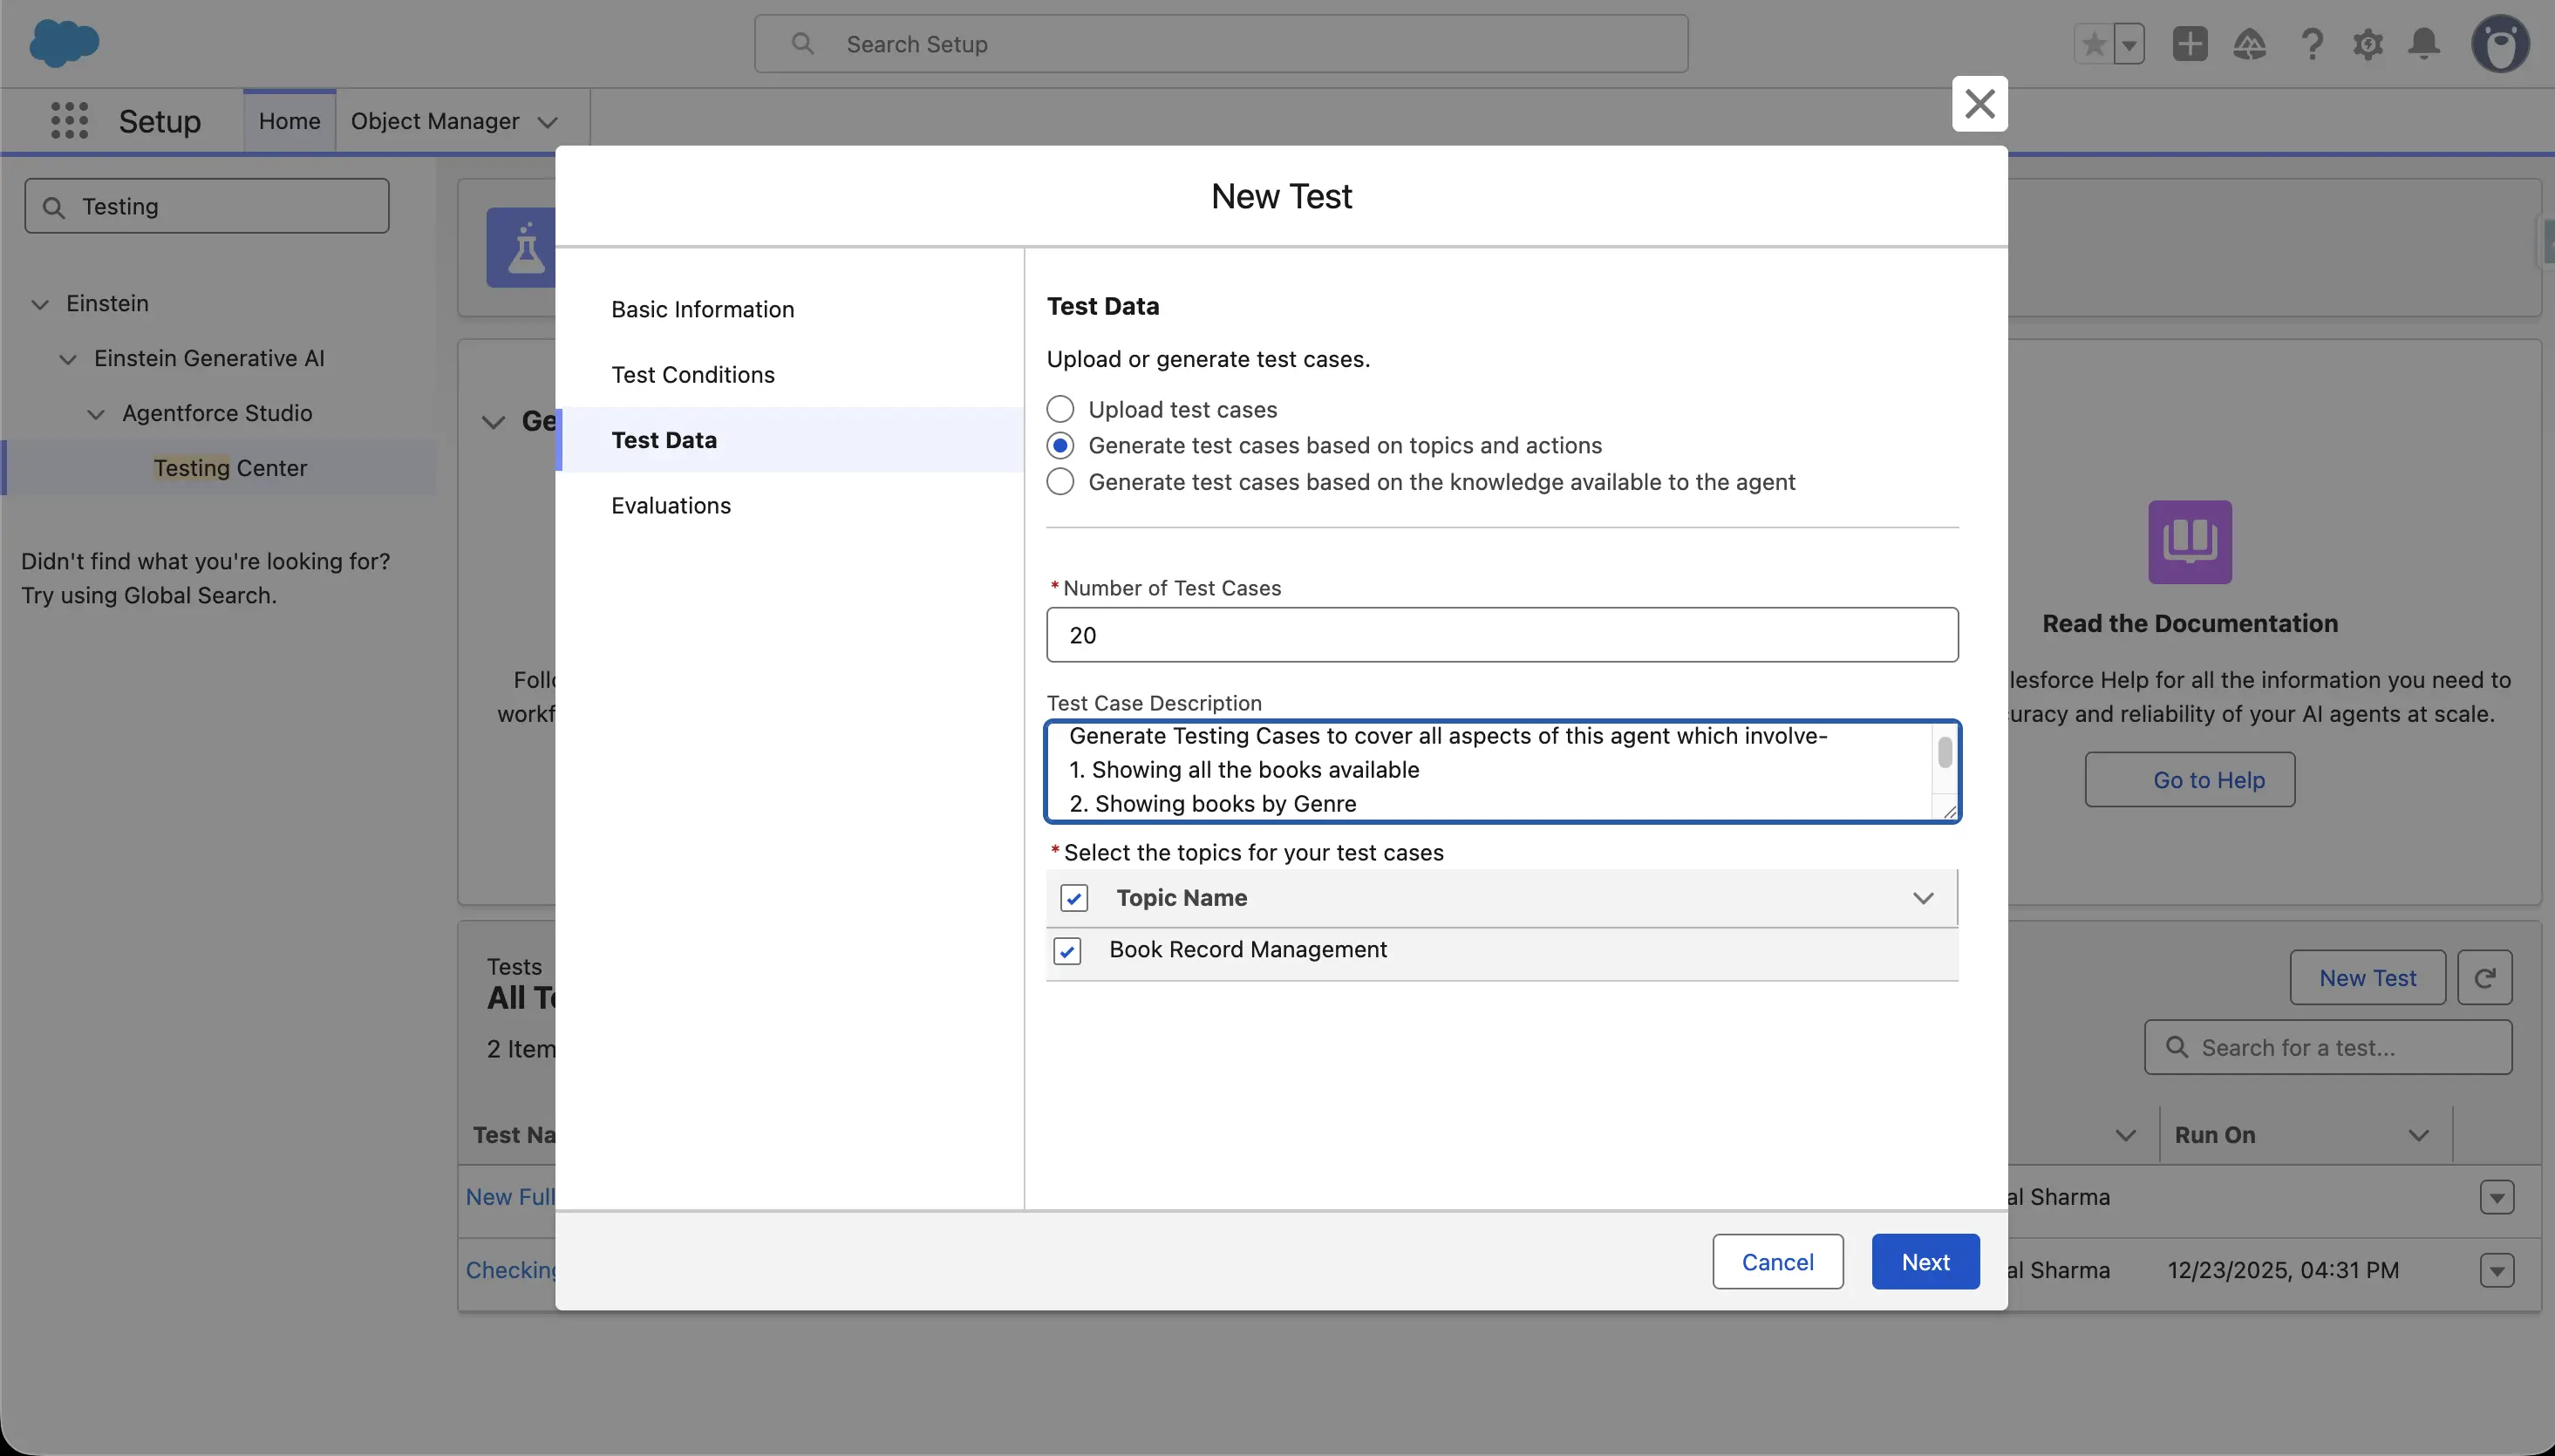
3. Create or Upload Test Cases
There are two main ways to define test cases:
A. Manual CSV Creation
- Use the Testing Center CSV template, which includes columns such as:
- Utterance: the input text (question or request)
- Expected Topic: the topic the agent should trigger
- Expected Actions: the list of actions the agent should run
- Expected Response: the desired agent output description
- Save your test cases as a CSV file and upload it in the Testing Center.